goSecure Documentation Current version 0.9.9
Introduction
goSecure is an easy to use and portable Virtual Private Network (VPN) solution.
The system consists of a single server and one or many clients.
strongSwan is used to establish a Suite B IPsec tunnel with pre-shared keys between the server and client(s).
The server component is a multi-homed [laptop/server/cloud instance/Raspberry Pi] that runs strongSwan using the NSA Commercial Solutions for Classified (CSfC) guidelines for protecting classified data. It is built upon a minimal and hardened Linux instance per DISA Security Technical Implementation Guides (STIGs).
The client component is a Raspberry Pi that runs strongSwan using the NSA CSFC guidelines for protecting classified data and it utilizes its hardware Random Number Generator (RNG). It is built upon a minimal and hardened Linux instance per DISA STIGs.
The client currently supports 3 modes of operation:
- Ethernet (eth0) LAN - Wifi (wlan0) WAN
- Ethernet (eth1) LAN - Ethernet (eth0) WAN
- Wifi LAN (wlan0) - Ethernet (eth0) WAN
Build Components
Step 0: Prerequisites
Decide on values for the following before starting:| Variable | Value |
|---|---|
| Client ID | i.e. client1.ix.mil |
| Client Pre-Shared Key | i.e. "cxvljals@fj09q2jasdf#dsjvk(asdjf" Note: The PSK must be at least 16 characters. The PSK must also be surrounded in double quotes and cannot contain a double quote within. |
Step 1: Build Server Side
Note: The server component build instructions are an example that can be used by affaliates that desire a complete solution, but the client component can interoperate with any VPN server that can be configured using the NSA CSFC guidelines.
Select a server side deployment option:
- Prerequisites
- Hardware
- A laptop, desktop, or server with 2 network interfaces. In this example we will be using a laptop that has only 1 ethernet port on it and an external USB to Ethernet adapter (like the SIIG JU-NE0211-S1 USB 3.0 to Gigabit Ethernet or Apple USB 2.0 to Ethernet) to add a second port.
- Software
- CentOS 6.8 64-bit (minimal): http://isoredirect.centos.org/centos/6.8/isos/x86_64/
- Install OS
- Install CentOS 6.8 64-bit (minimal)
- Configure Networking
- vi /etc/sysconfig/network-scripts/ifcfg-eth0
- Change "ONBOOT=no" to "ONBOOT=yes" in the file.
- service network restart
- sudo yum install -y wget
- Ensure the SIIG USB-to-Ethernet adapter is plugged in.
- wget http://www.siig.com/media/files/drivers/0010/02-1634d-linux-v1.13.0.zip
- unzip 02-1634d-linux-v1.13.0.zip
- cd Linux
- tar -xf AX88179_178A_LINUX_DRIVER_v1.13.0_SOURCE.tar
- cd AX88179_178A_LINUX_DRIVER_v1.13.0_SOURCE
- make
- make install
- Unplug the SIIG USB-to-Ethernet adapter and plug it back in.
- cp /etc/sysconfig/network-scripts/ifcfg-eth0 /etc/sysconfig/network-scripts/ifcfg-eth1
- vi /etc/sysconfig/network-scripts/ifcfg-eth1
- Change "DEVICE=eth0" to "DEVICE=eth1"
- Change the "HWADDR=<eth0 MAC address>" to "HWADDR=<eth1 MAC address>"
- Delete the "UUID" line.
- Change "BOOTPROTO=dhcp" to "BOOTPROTO=static" in the file.
- Add "IPADDR=172.16.166.1" and "NETMASK=255.255.255.0" to the bottom of the file.
- service network restart
- Run the goSecure Server Install Script
- cd ~
- wget https://iadgov.github.io/goSecure/files/install_scripts/gosecure_server_install.py Note: replace the 2 arguments in the command below with your values. (i.e. sudo python gosecure_server_install.py client1@ix.mil "mysupersecretpsk")
- sudo python gosecure_server_install.py <client_id (i.e. client1@ix.mil)> <client_psk (i.e. "atleast16characterswithinquotes")>
-
Configure external (Internet) facing interface and update the OS:
Note: If you have the exact same SIIG USB-to-Ethernet adapter, please follow the "Install eth1 (SIIG) driver" section. Otherwise, please skip the "Install eth1 (SIIG) driver" section and follow the instructions that were provided by the manufacturer of your USB-to-Ethernet device to install the driver.
Install eth1 (SIIG) driver:
Configure internal (Enterprise) facing interface:
Note: Use the same format for the MAC address, i.e. "00:00:BA:XX:XX:XX". The MAC address for eth1 can be found on the back of the SIIG USB-to-Ethernet adapter.
- Prerequisites
- AWS SSH Key
- Log in to the AWS console.
- In the top menu bar, select the region of your choice. (Instructions for changing the region here).
- Create your own SSH key pair using these instructions: http://docs.aws.amazon.com/AWSEC2/latest/UserGuide/ec2-key-pairs.html#having-ec2-create-your-key-pair
- Deploy template using AWS CloudFormation
- Download the goSecure Proxy CloudFormation template from here: https://iadgov.github.io/goSecure/files/install_scripts/aws_proxy.template
- Log in to the AWS console.
- In the top menu bar, select the region for which you created the SSH key. (Instructions for changing the region here).
- In the top menu bar, click on "Services" and then click on "CloudFormation".
- Click on the "Create Stack" button.
- Under the "Choose a template" heading, select "Upload a template to Amazon S3" and then click on the "Choose File" button.
- Select the "aws_proxy.template" that you downloaded.
- Click on the "Next" button.
- Type in "goSecureProxyStack" in the "Stack name" textbox.
- Type in the first client's pre-shared key (PSK) in the "Client0Psk" textbox. The PSK must be at least 16 characters. The PSK must also be surrounded in double quotes and cannot contain a double quote within.
- Type in the first client's client ID in the "ClientId" textbox.
- Select your instance type for the "InstanceType" dropdown menu.
- Select the existing SSH key pair in the "KeyName" dropdown menu.
- Click on the "Next" button.
- Click on the "Next" button.
- Click on the "Create" button.
- Wait until the Stack "Status" changes to "CREATE_COMPLETE" and then wait another 5 minutes for the goSecure Server to initialize for the first time.
- In the top menu bar, click on "Services" and then click on "EC2".
- In the left menu bar, click on "Instances".
- Right click on the instance with the name "goSecure_Proxy-Server", hover over "Networking", and then click on "Manage Private IP Addresses".
- Note the IP in the “Public “IP” column. This IP will be what your goSecure Client connects to.
- Prerequisites
- Hardware
- Raspberry Pi 3 Model B or Raspberry Pi 2 Model B
- 2GB (minimum size) SD Card
- Ensure an external USB to Ethernet adapter (like the SIIG JU-NE0211-S1 USB 3.0 to Gigabit Ethernet or Apple USB 2.0 to Ethernet) is plugged in an recognized (run "ifconfig" and ensure you see a "eth1").
- Software
- Raspbian Jessie Lite Image: https://downloads.raspberrypi.org/raspbian_lite_latest
- Install OS
- Install Raspbian Jessie Lite onto a SD Card using the instructions under the "WRITING AN IMAGE TO THE SD CARD" section from here.
- Turn on the Raspberry Pi with the SD Card installed.
- Login with the default credentials (username: "pi" and password: "raspberry").
- Configure OS
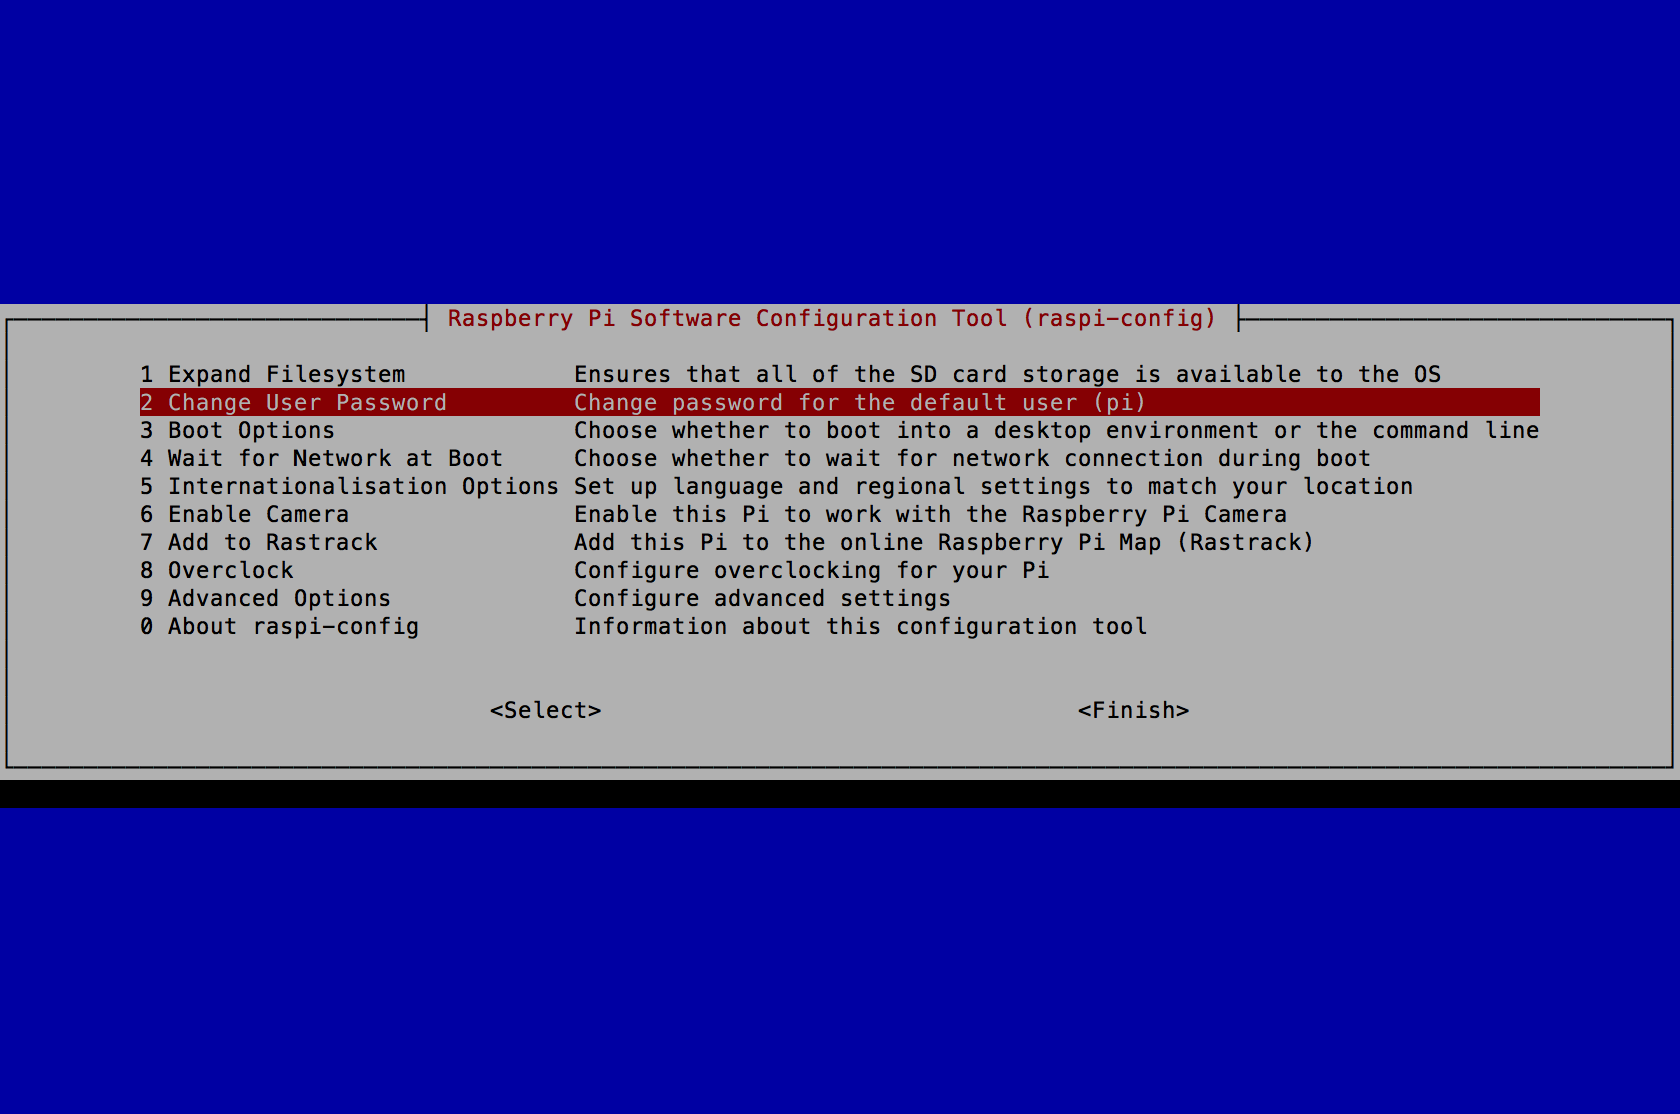
- sudo raspi-config
- Select "2 Change User Password" and press the "Enter" key.
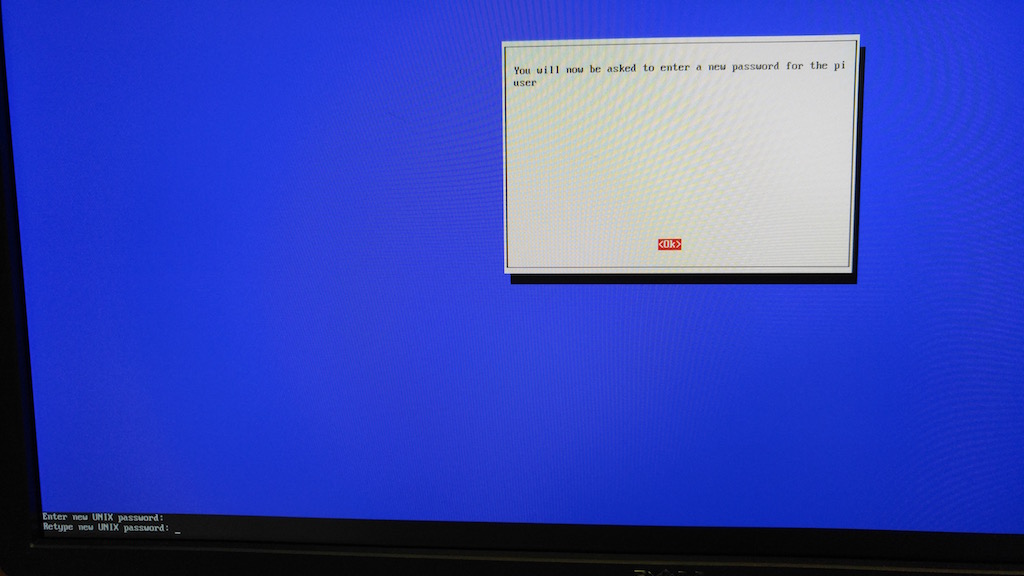
- Press the "Enter" key when you receive a message stating "You will now be asked to enter a password for the pi user"
- A new command line prompt stating "Enter new UNIX password:" will appear on the bottom of the screen, type in your new password and press the "Enter" key.
- A new command line prompt stating "Retype new UNIX password:" will appear on the bottom of the screen, type in your new password again and press the "Enter" key.
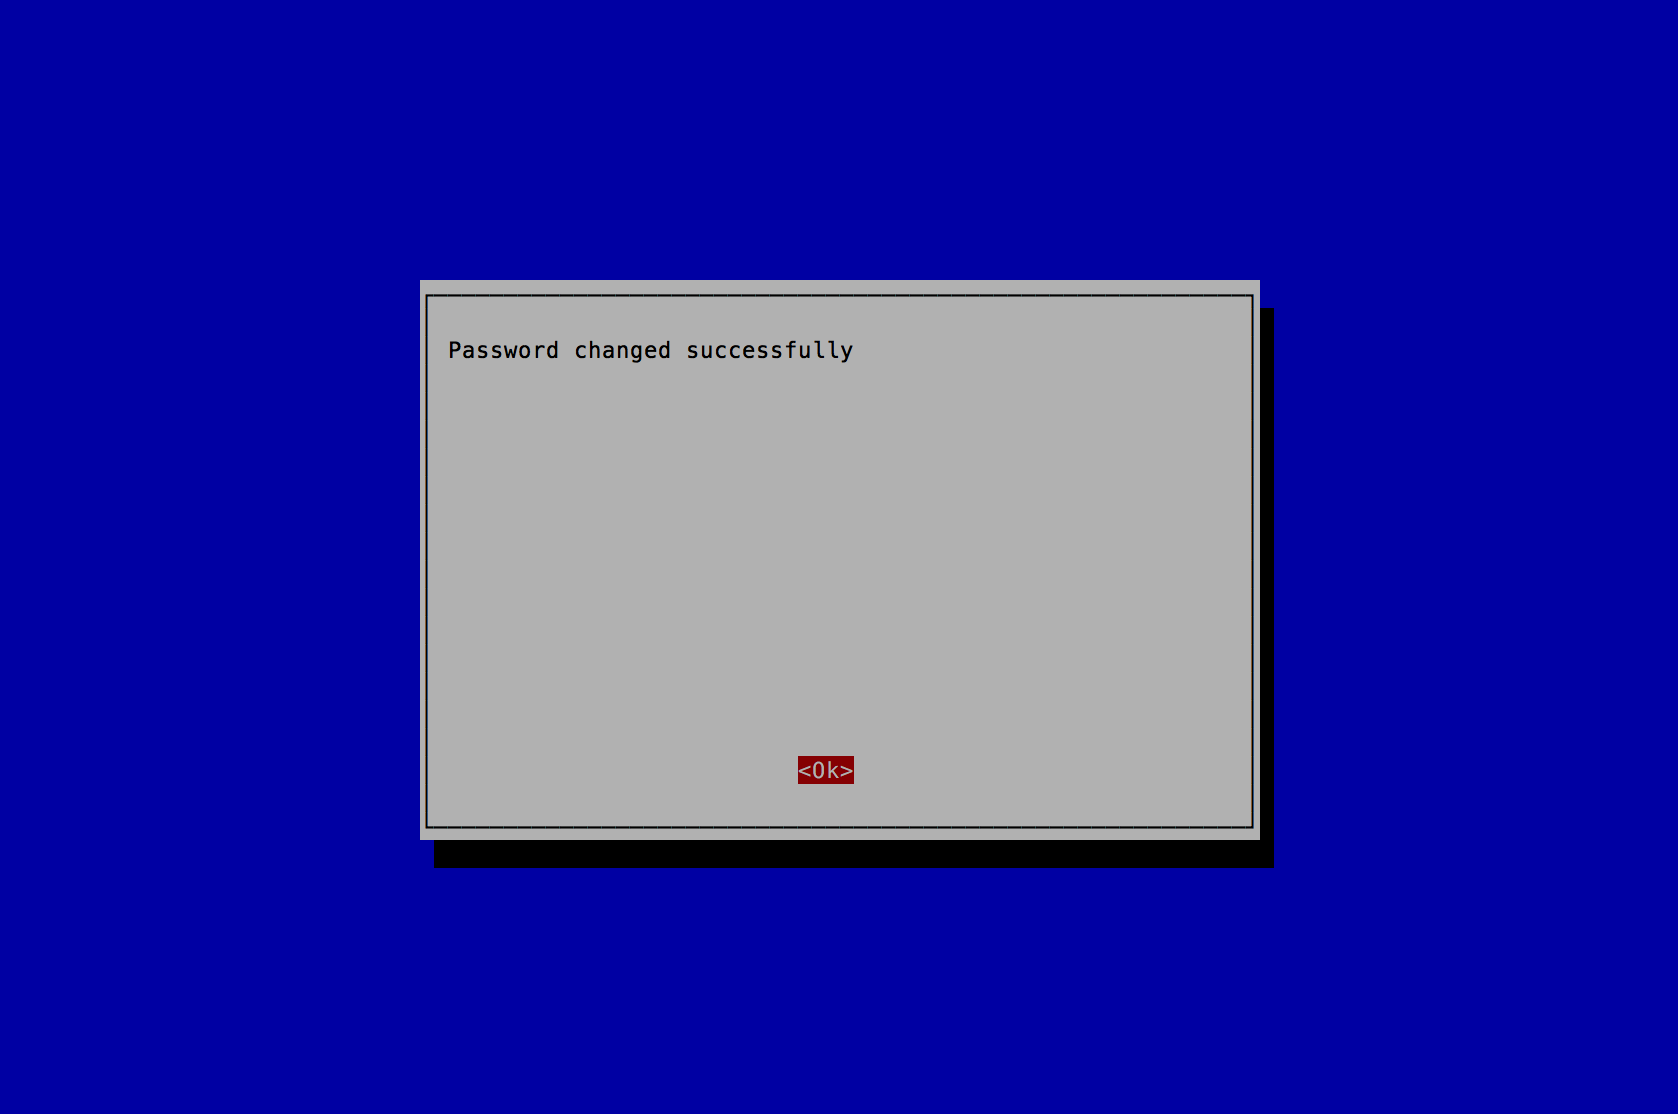
- A new prompt stating "Password changed successfully" will appear, press the "Enter" key to continue.

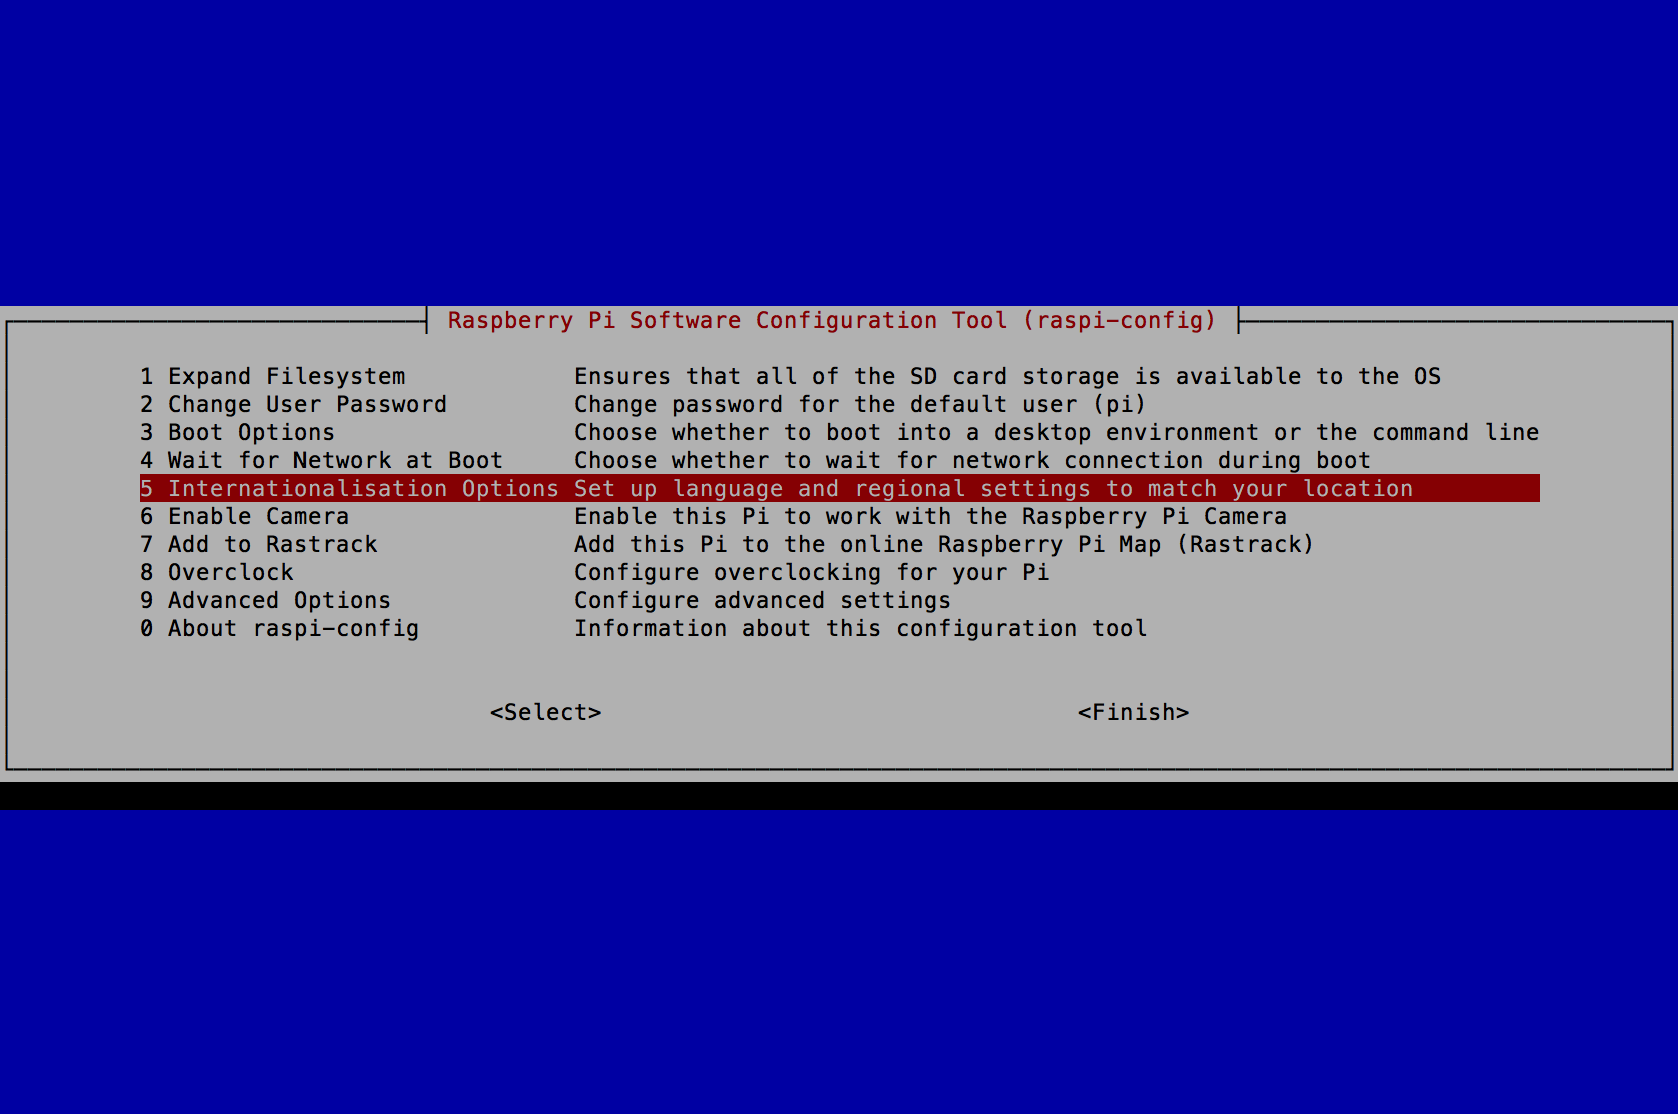
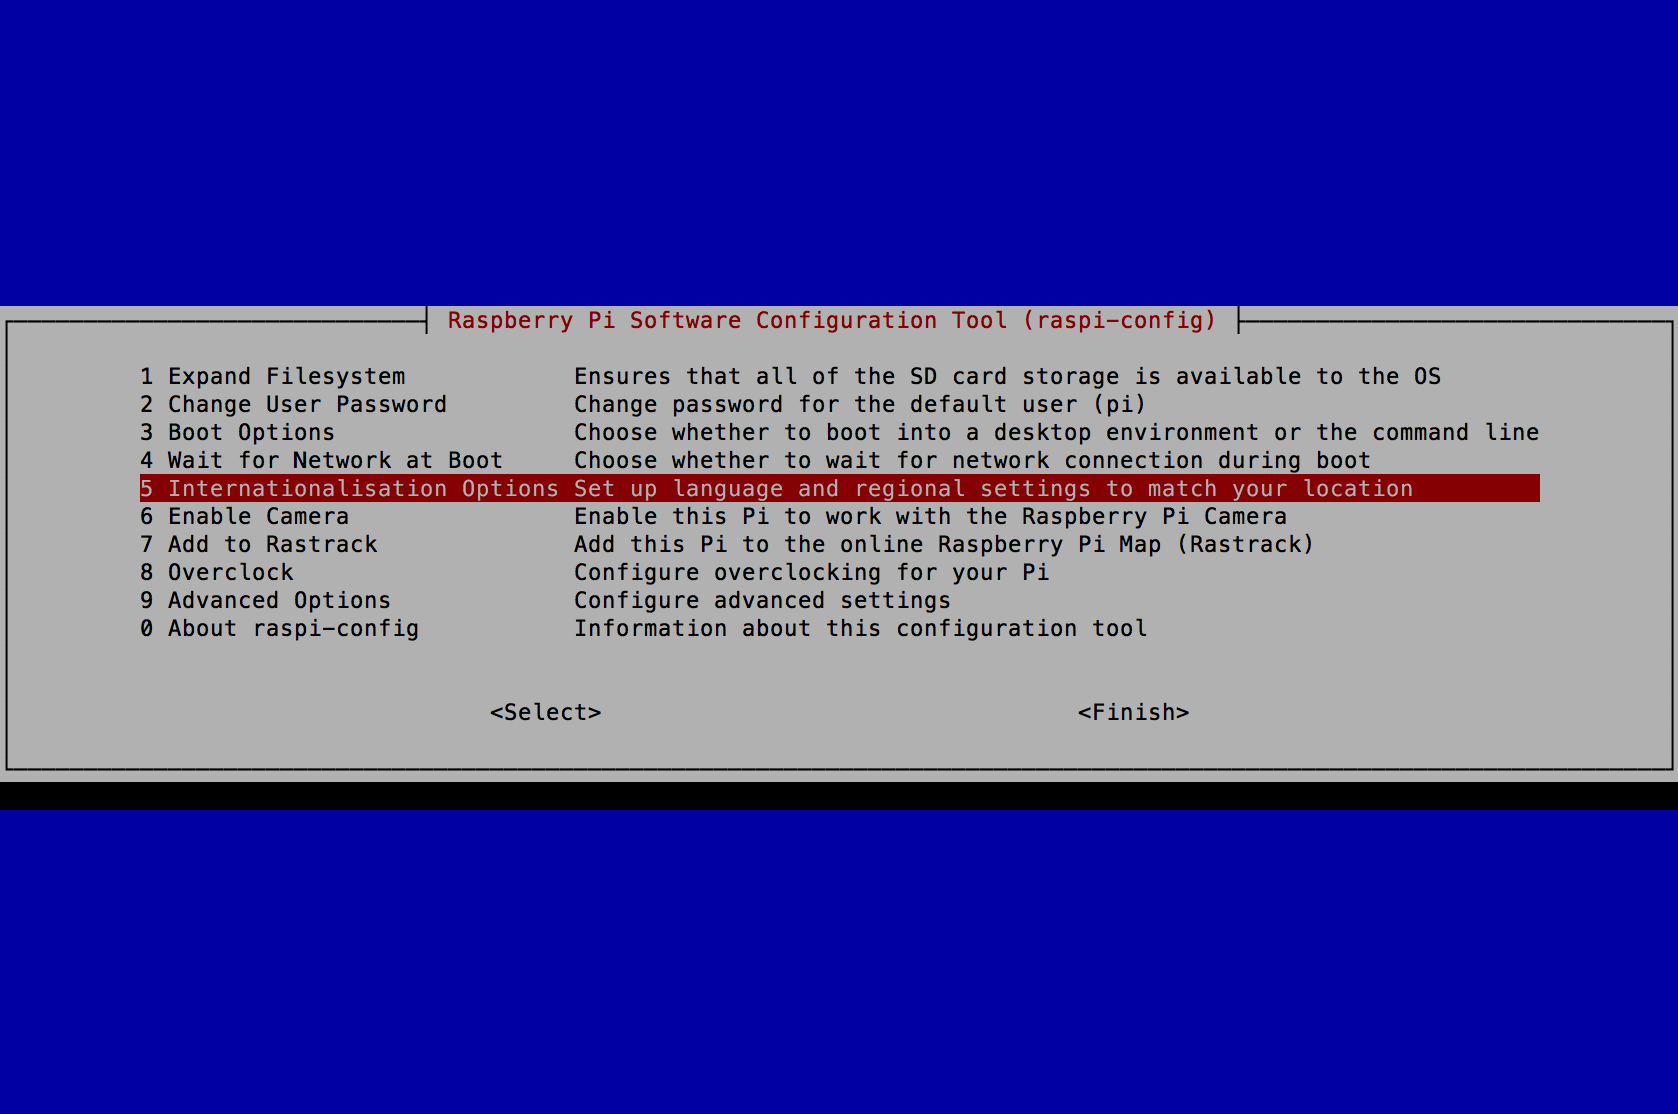
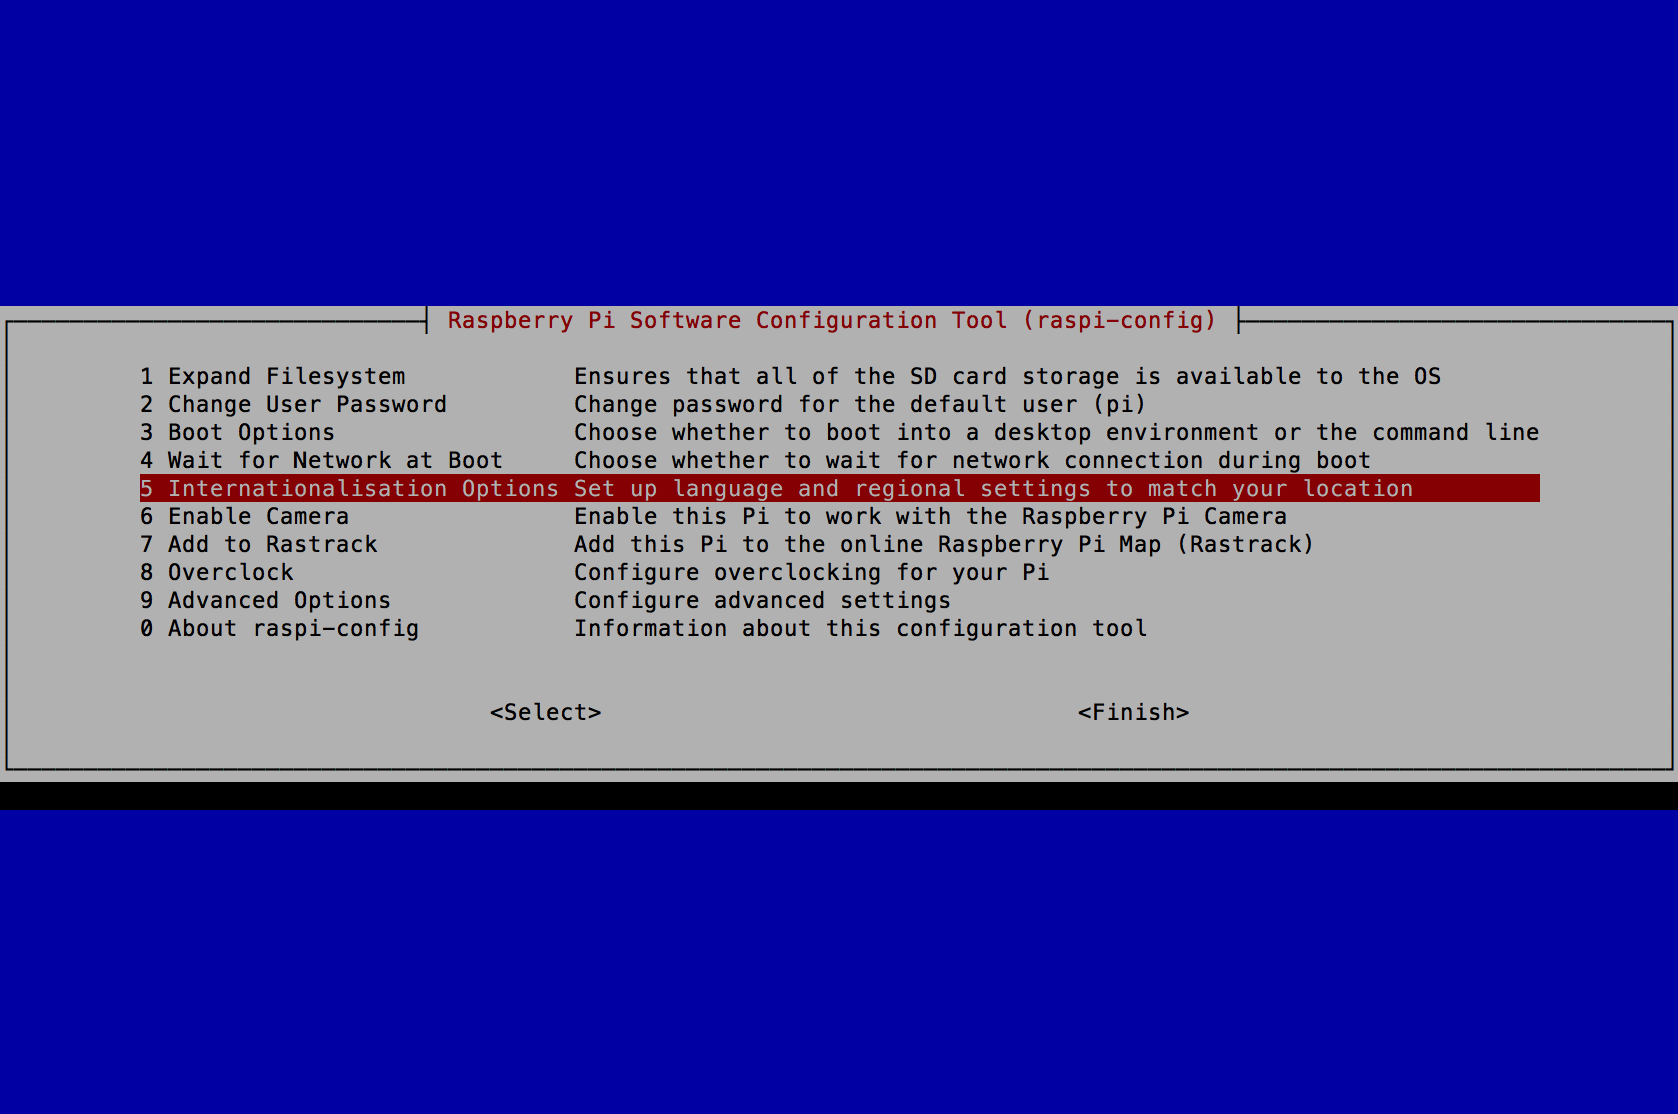
- Select "5 Internationalisation Options" and press the "Enter" key.
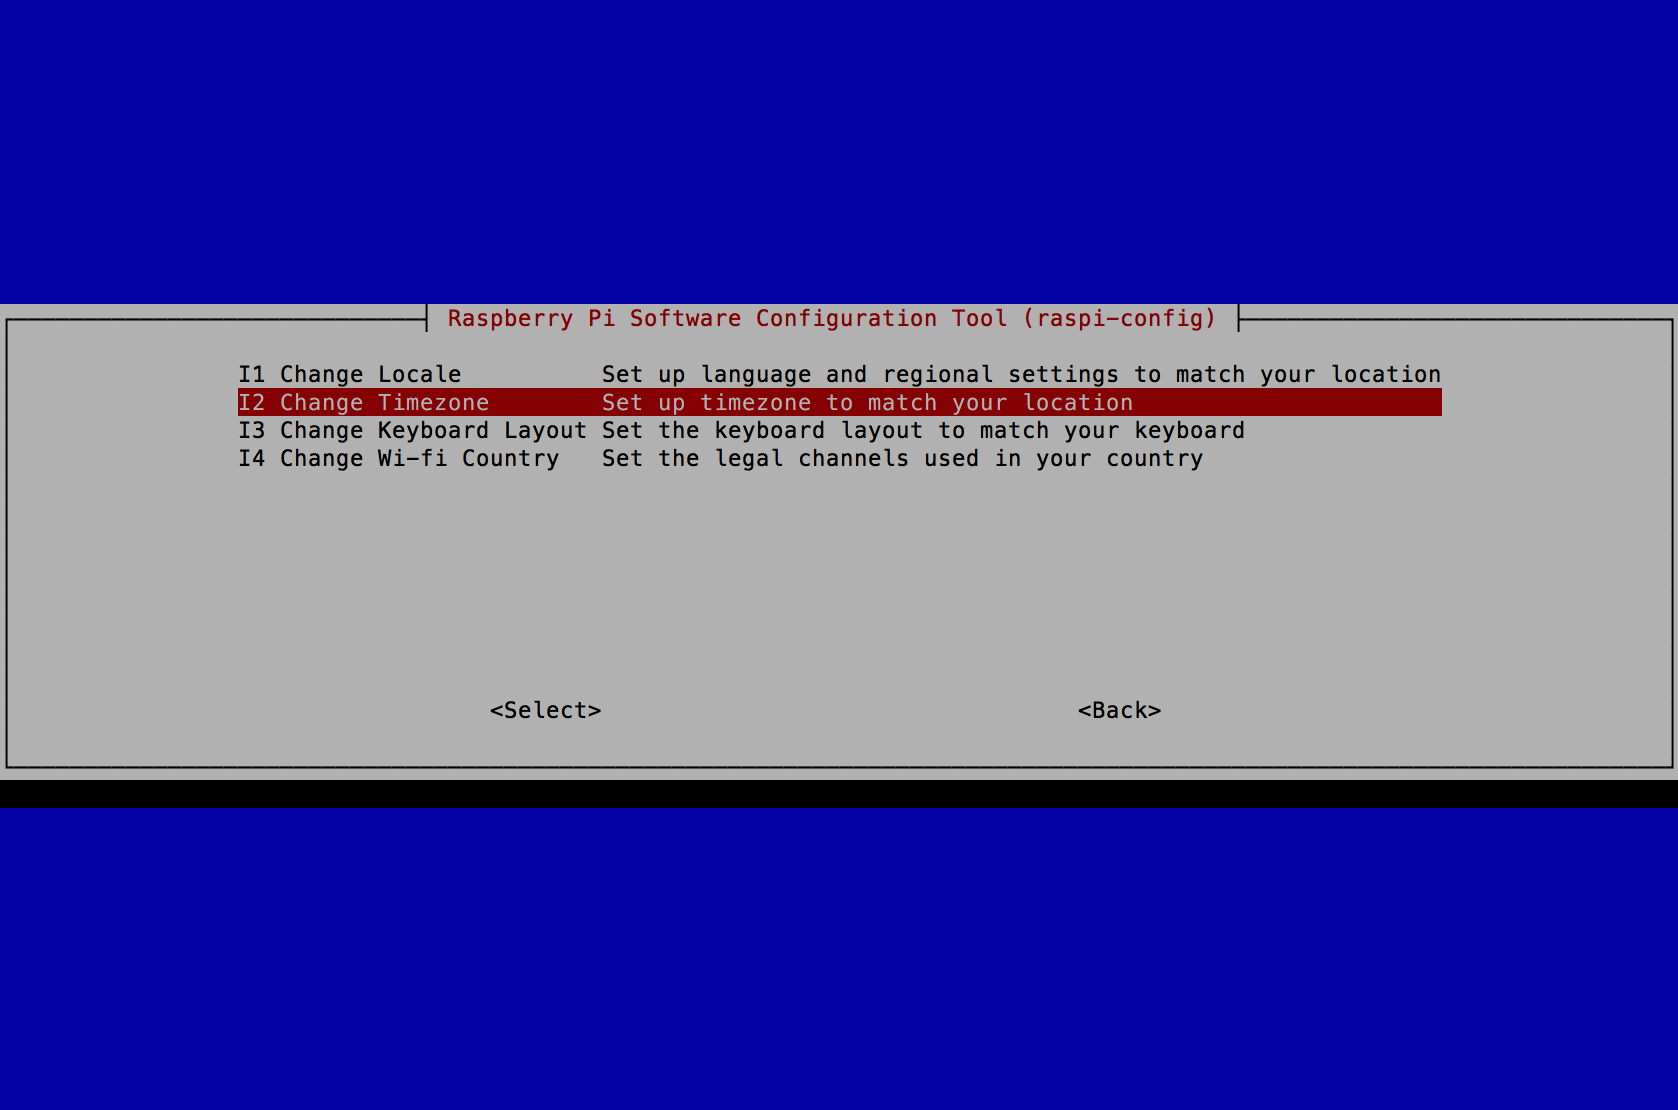
- Select "I2 Change Timezone" and press the "Enter" key.
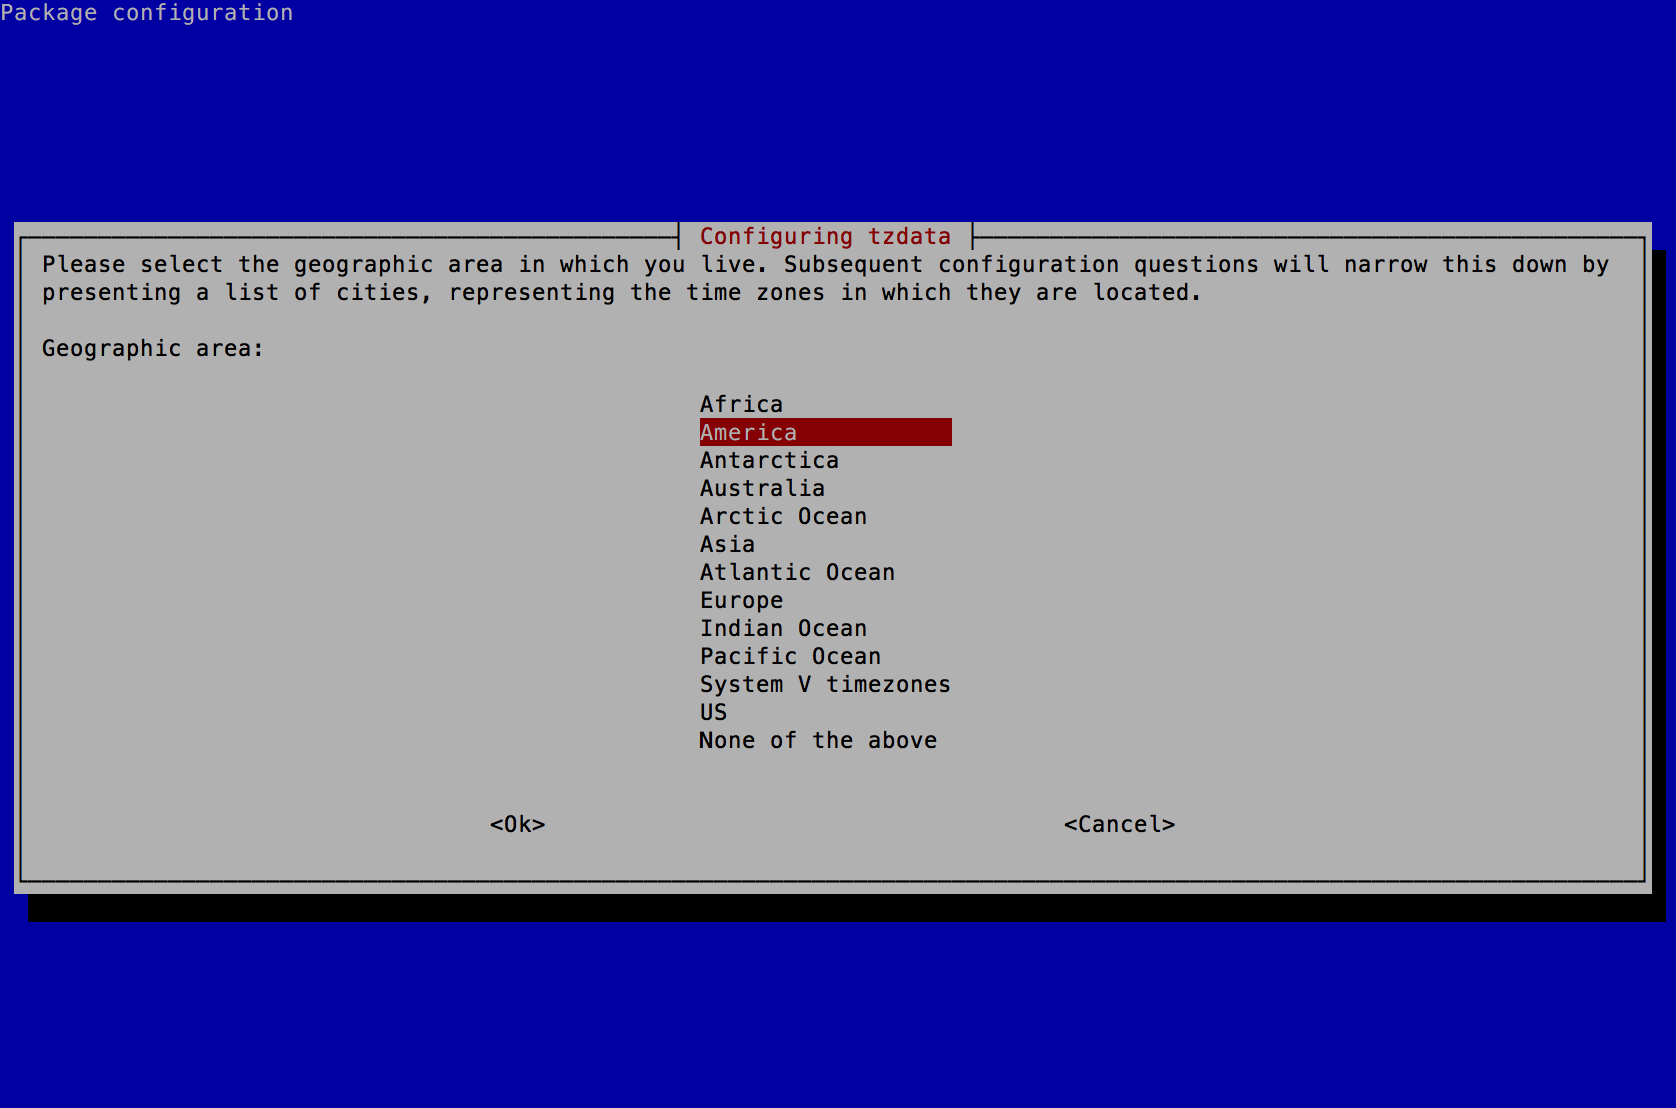
- Select "America" or the Country you reside in and press the "Enter" key.
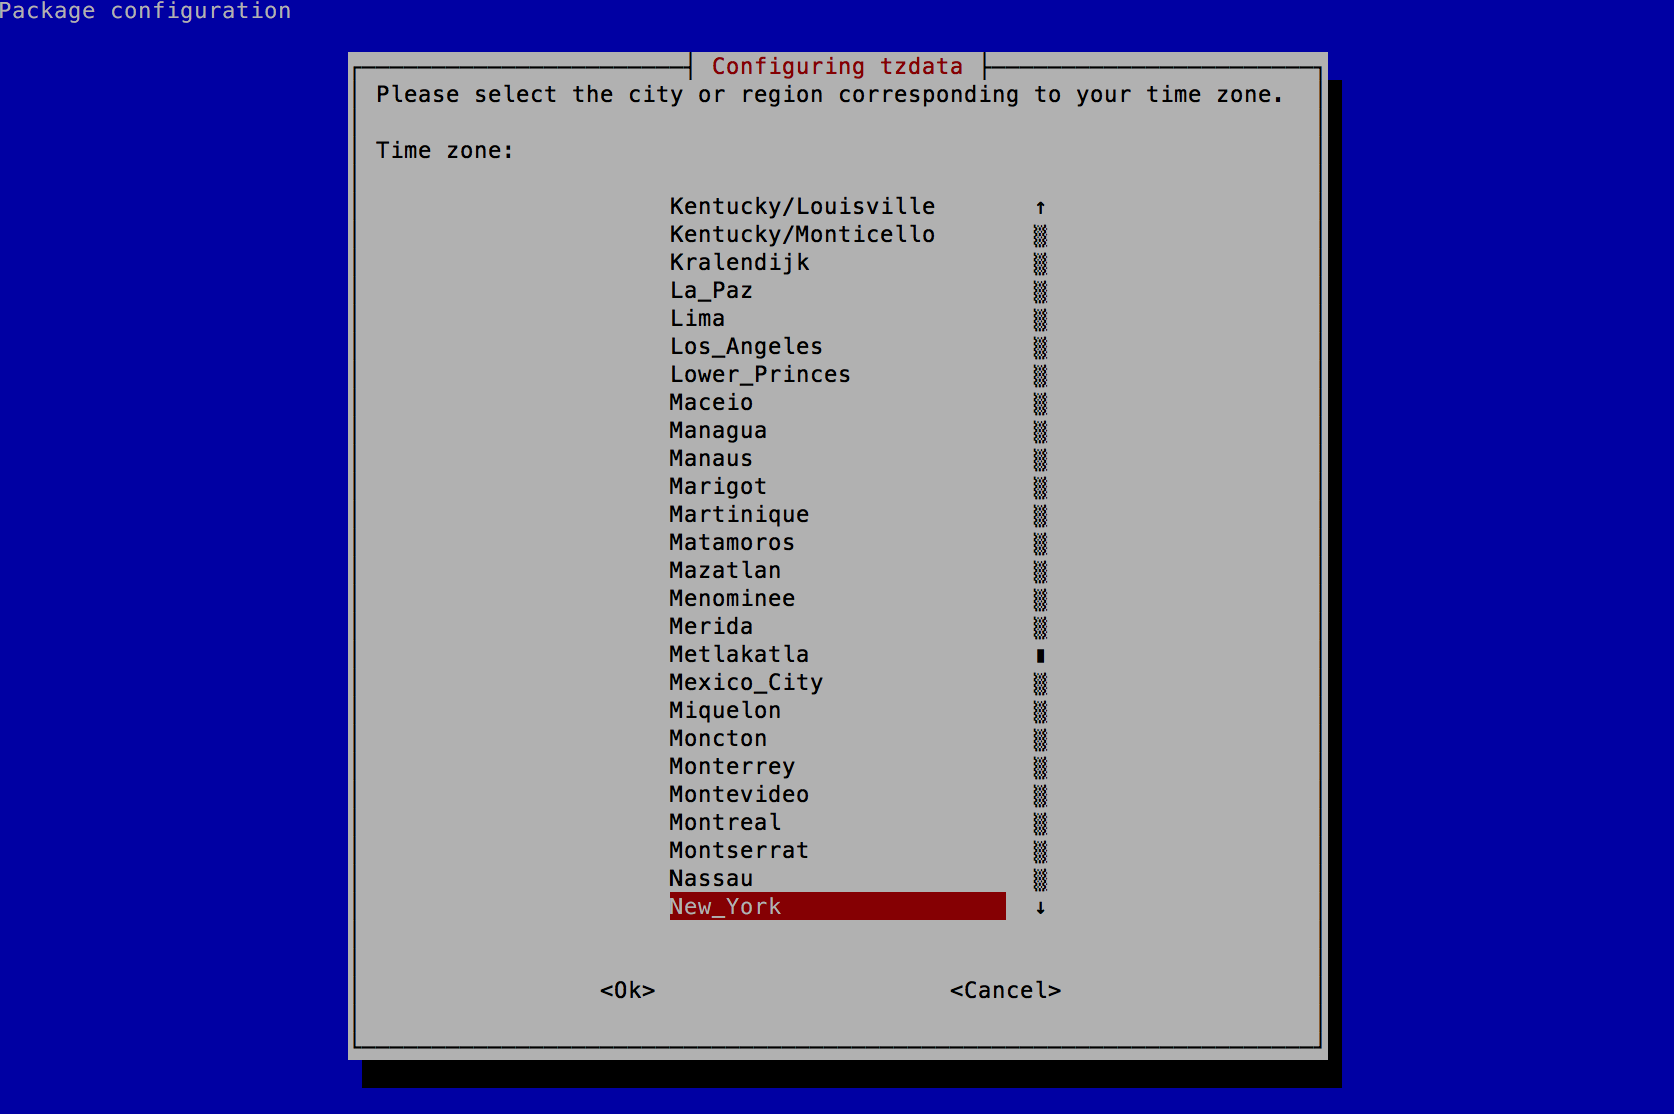
- Select "New_York" or the location you reside in and press the "Enter" key.
- Select "5 Internationalisation Options" and press the "Enter" key.
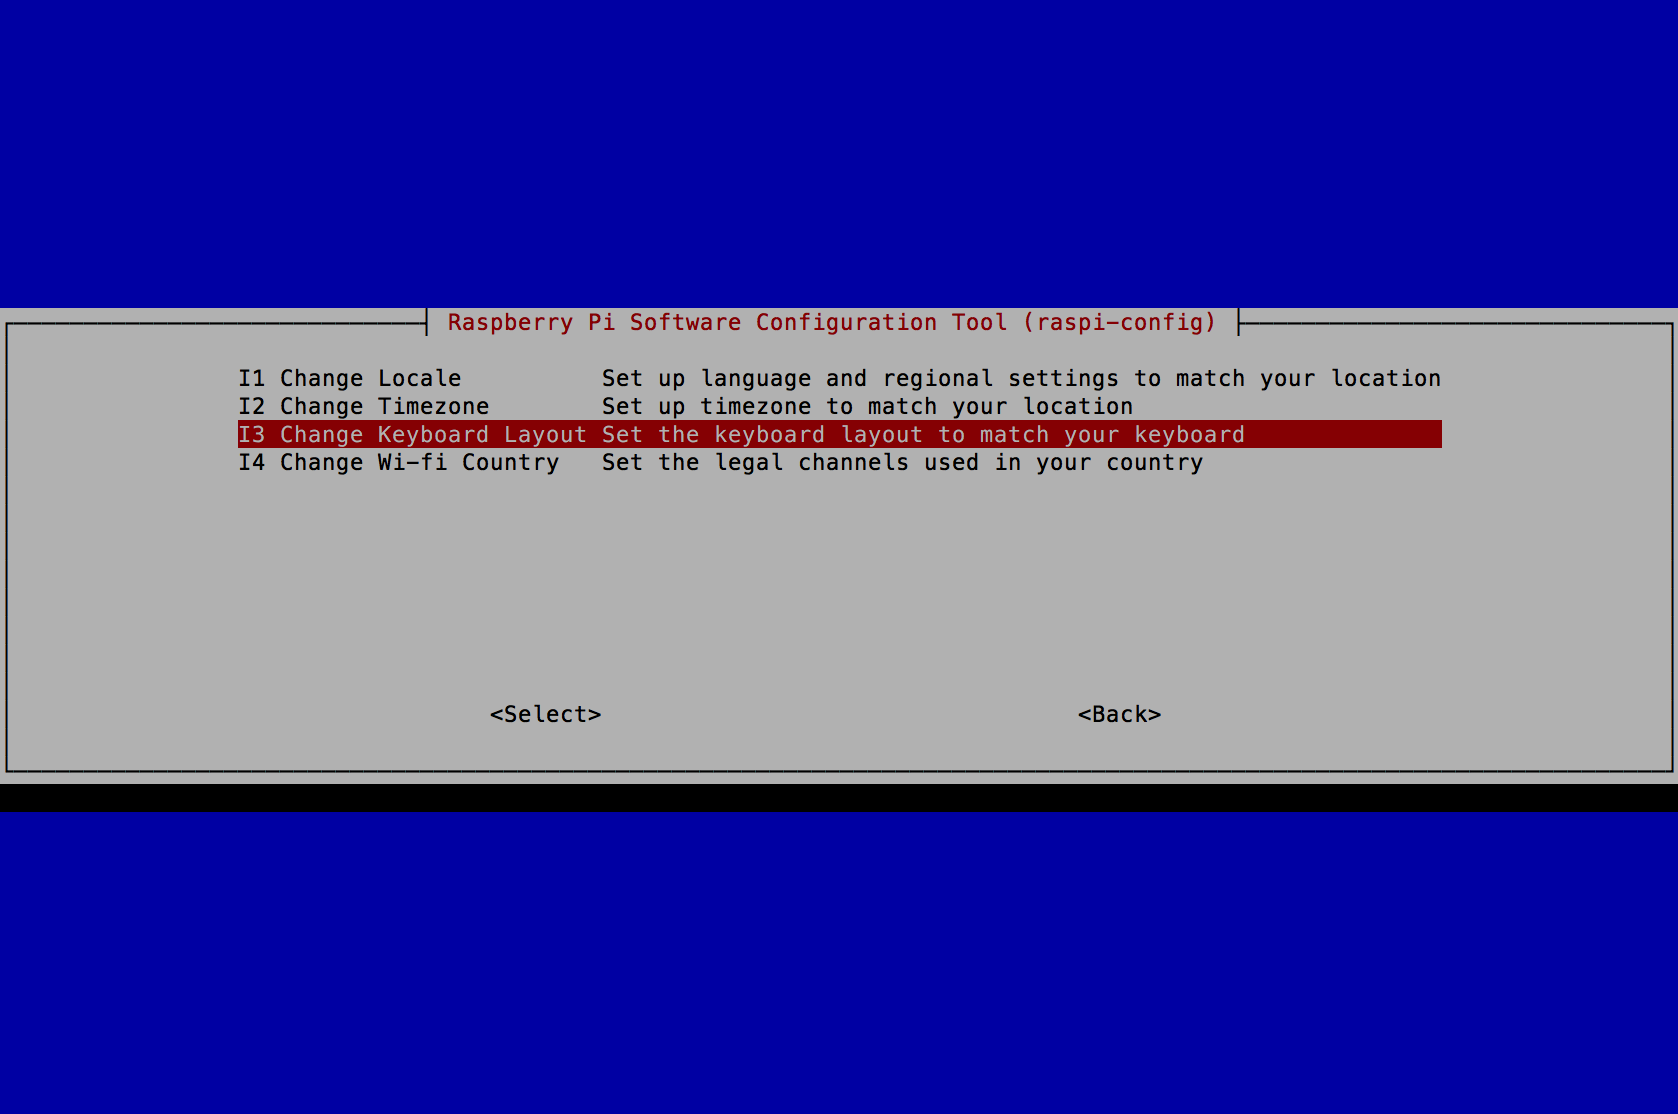
- Select "I3 Change Keyboard Layout" and press the "Enter" key.
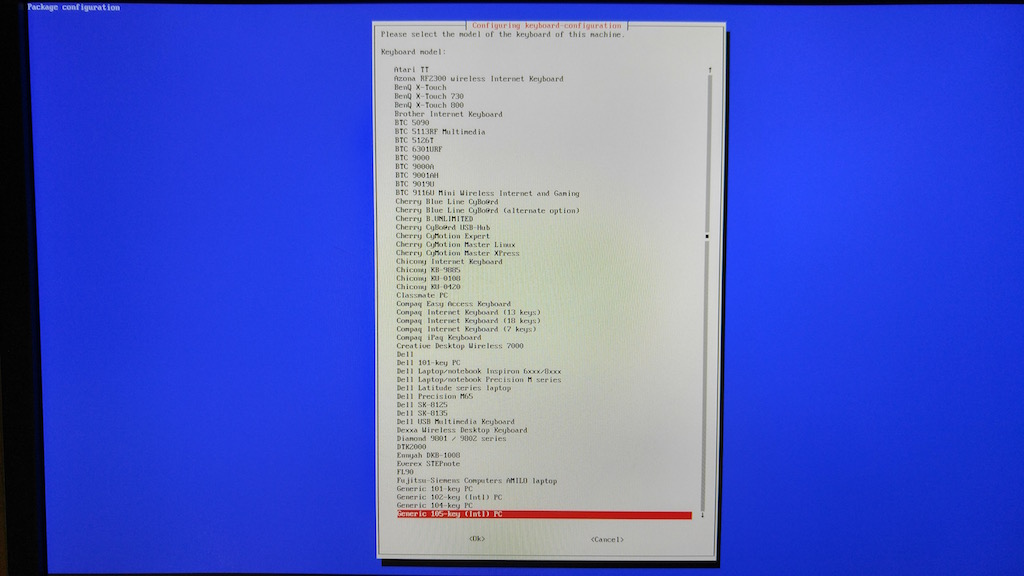
- Select "Generic 105-key (Intl) PC" and press the "Enter" key.
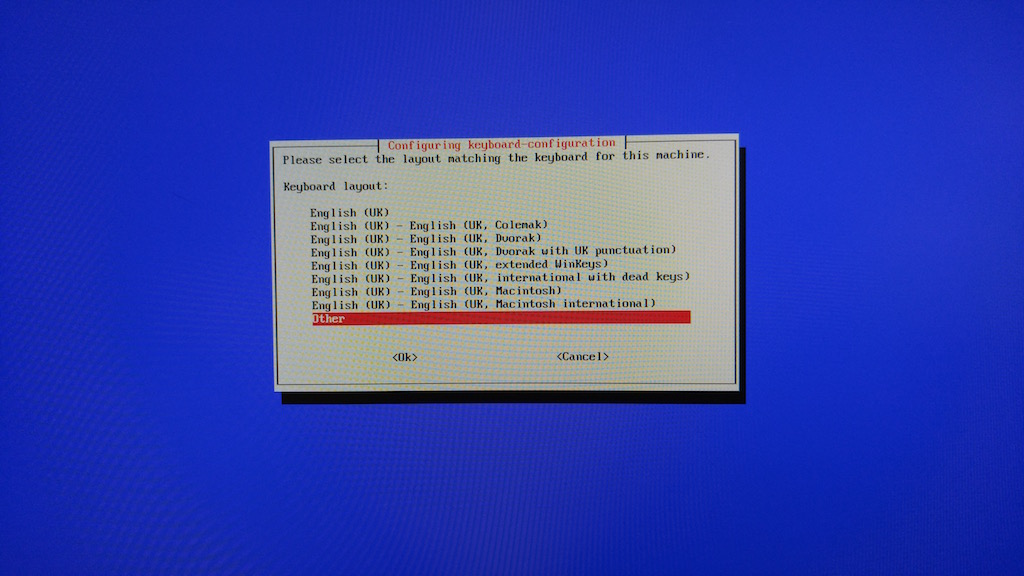
- Select "Other" and press the "Enter" key.
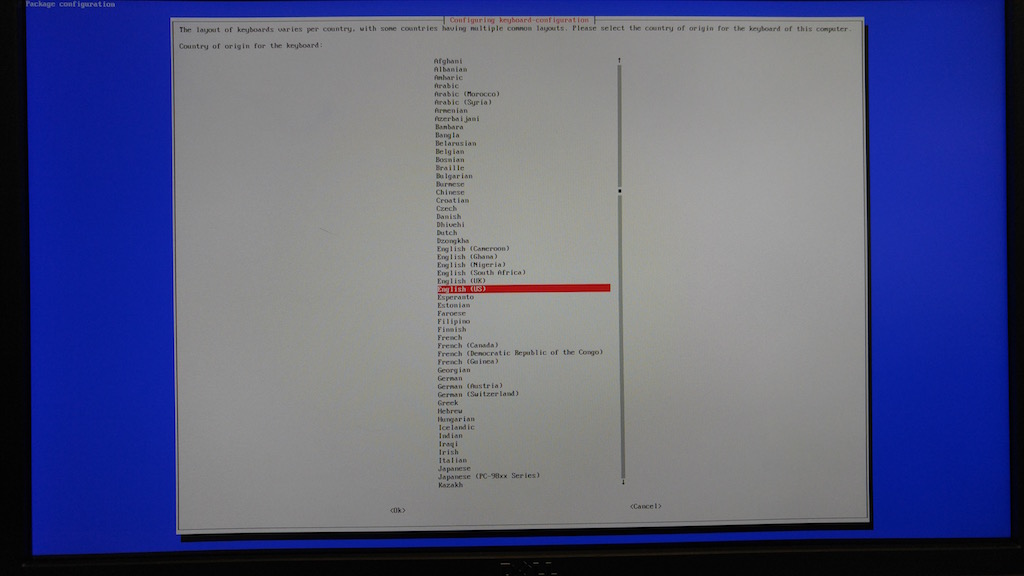
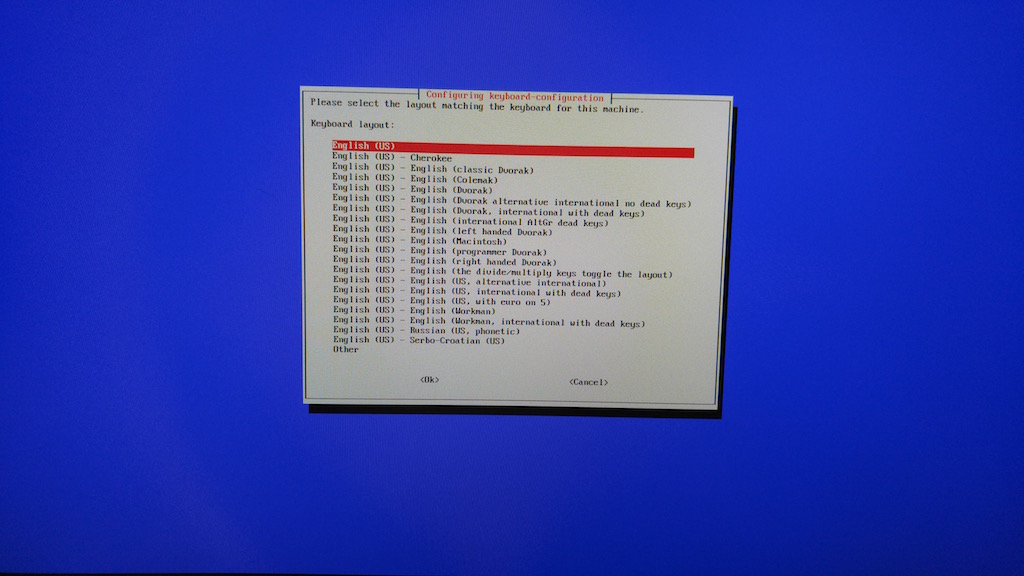
- Select "English (US)" and press the "Enter" key.
- Select "English (US)" and press the "Enter" key.
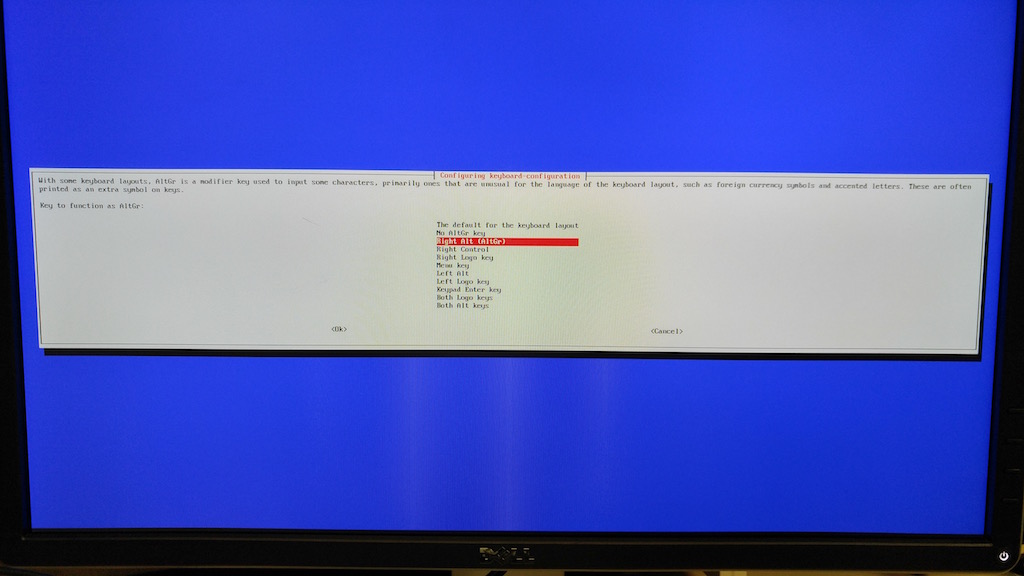
- Select "Right Alt (AltGr)" and press the "Enter" key.
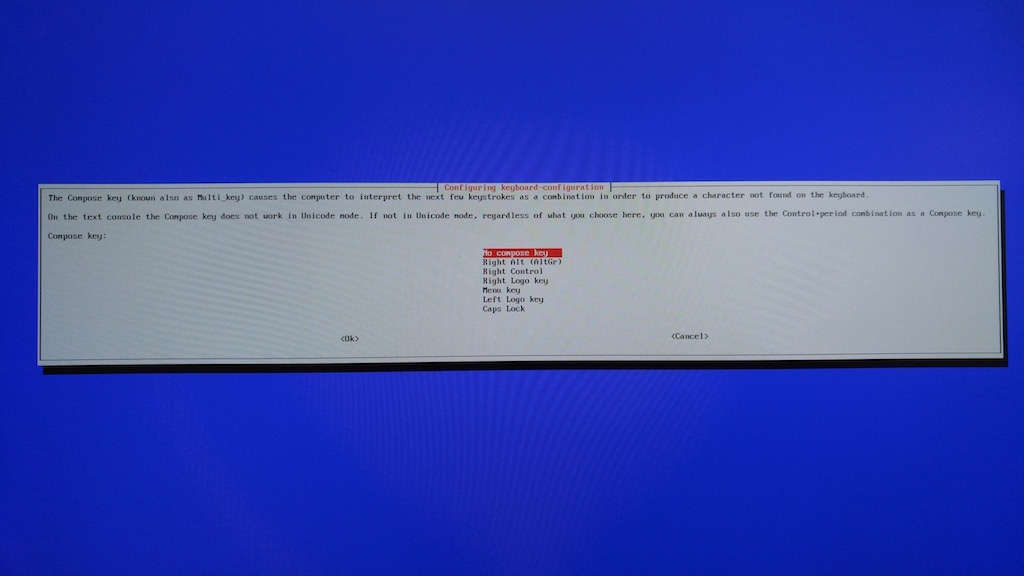
- Select "No compose key" and press the "Enter" key.
- Select "5 Internationalisation Options" and press the "Enter" key.
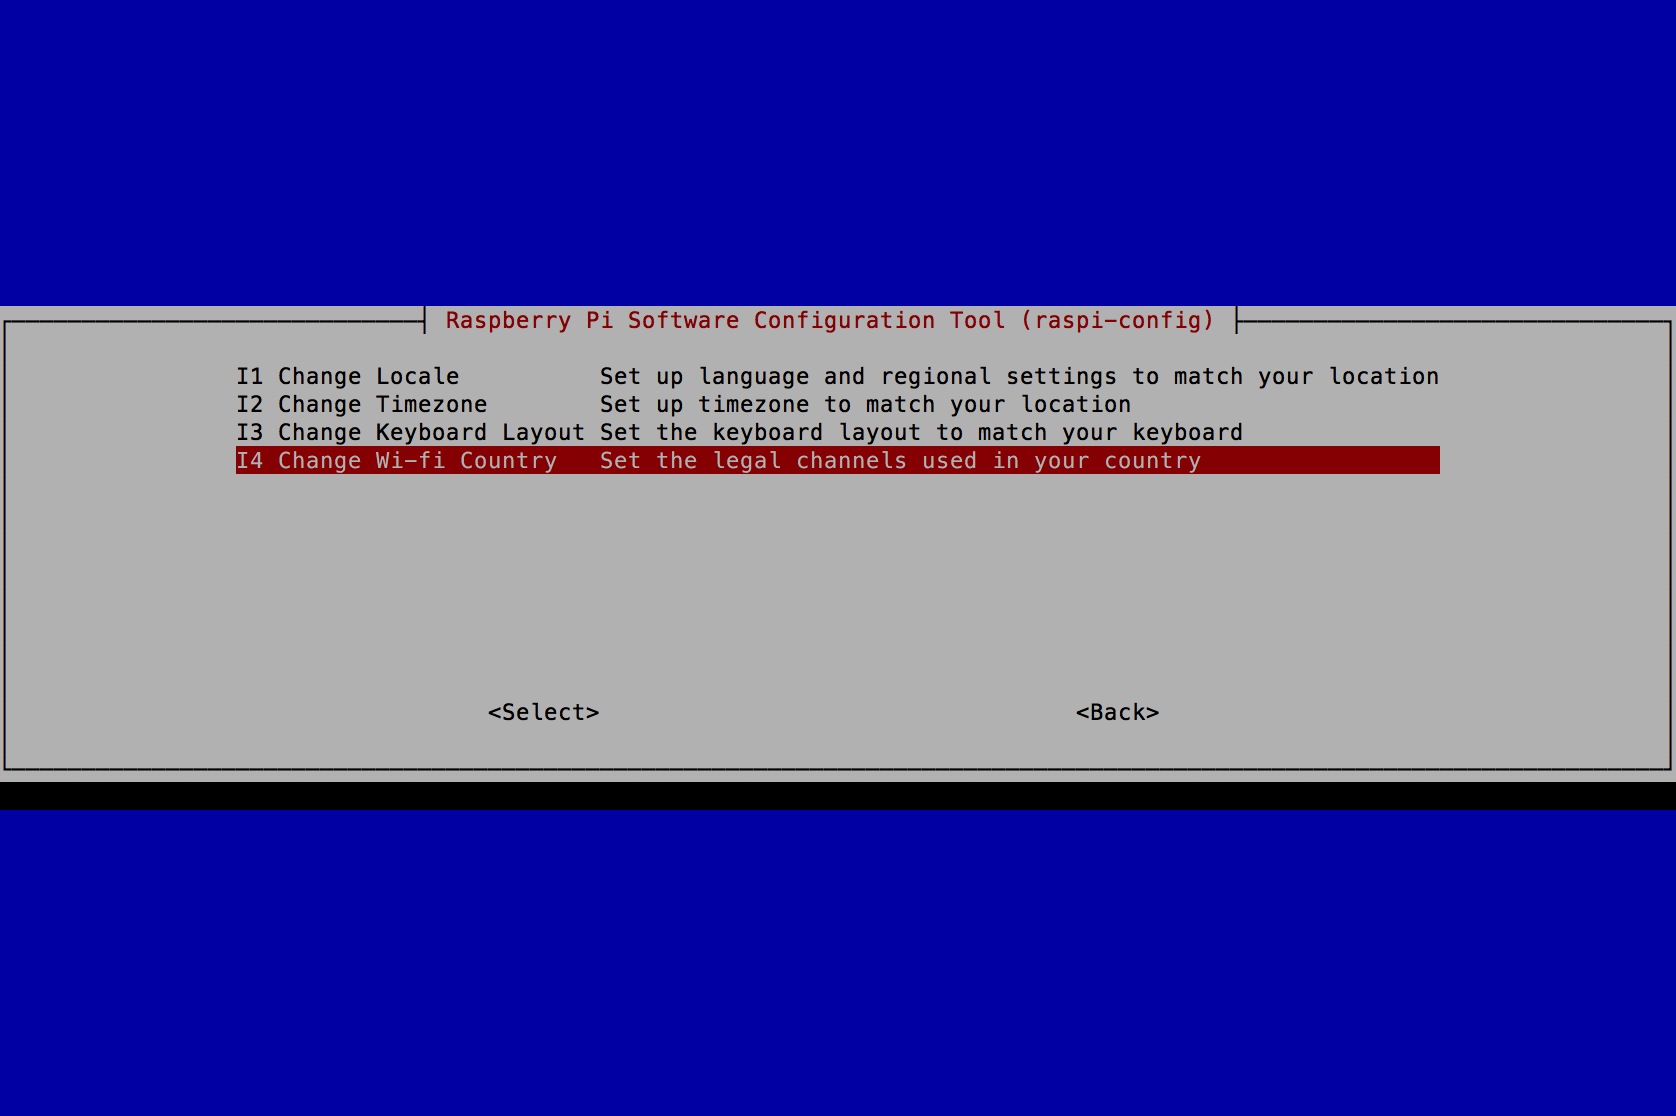
- Select "I4 Change Wi-fi Country" and press the "Enter" key.
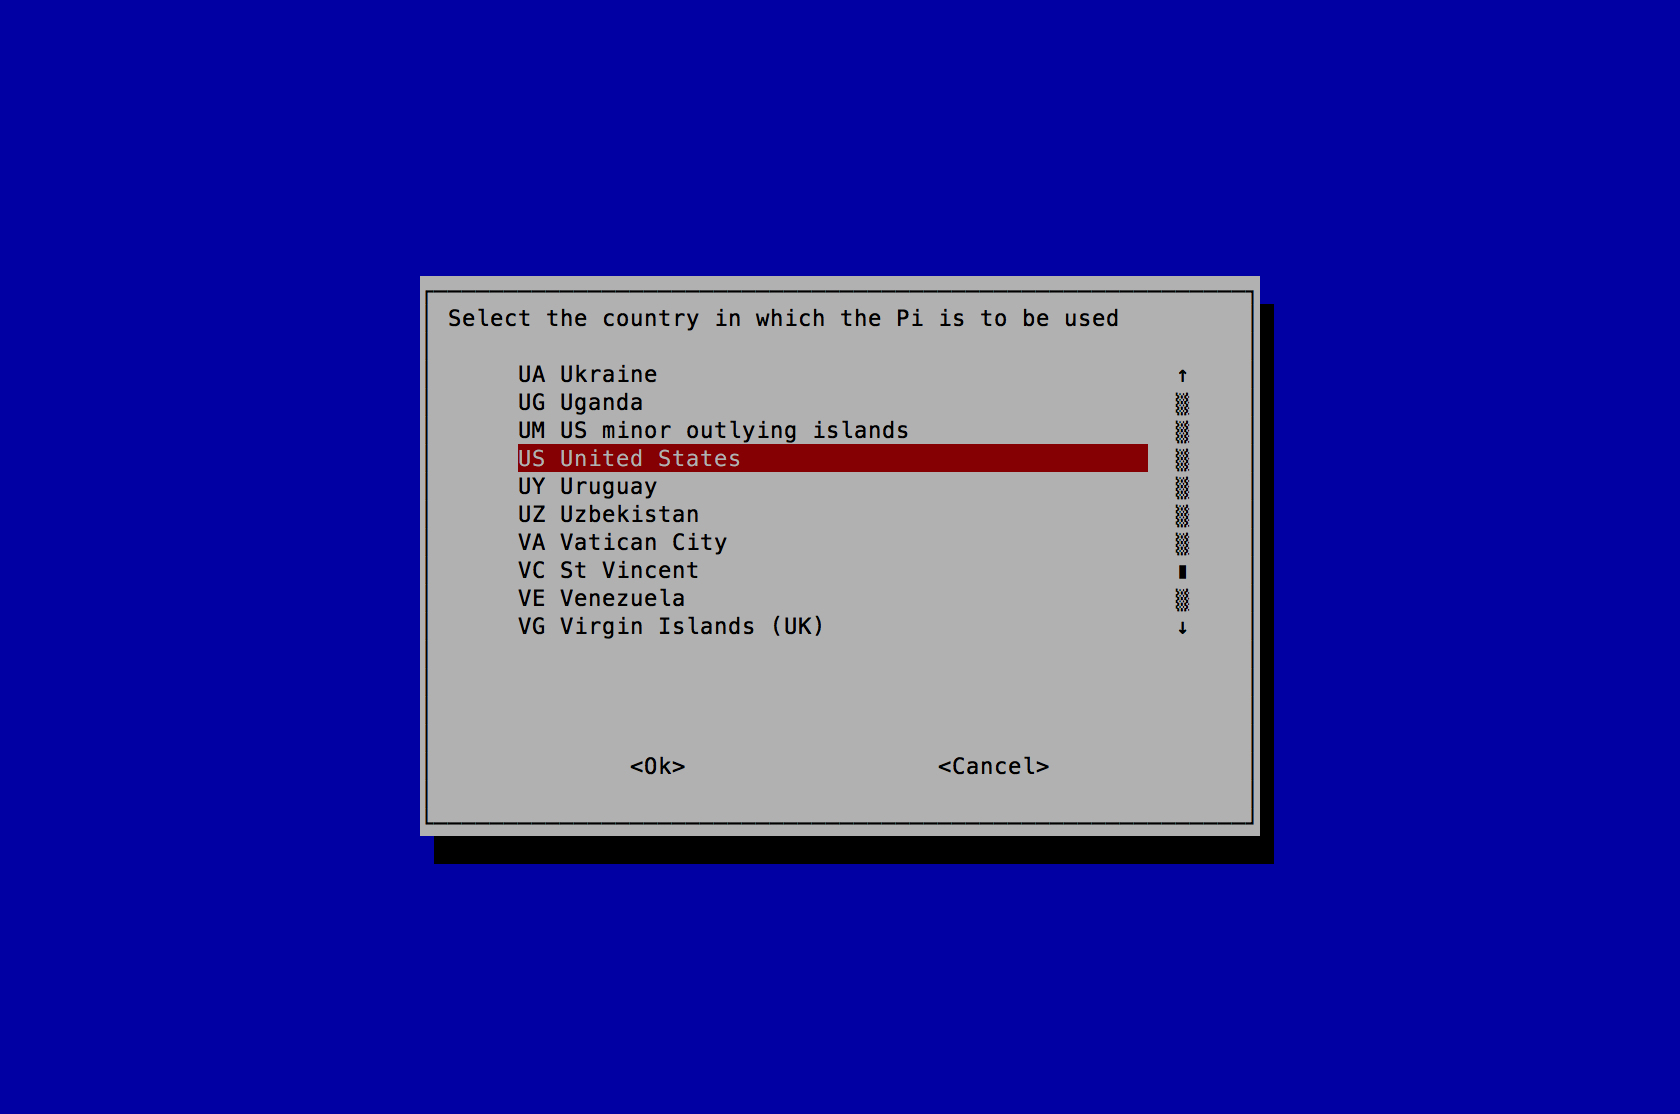
- Select "US United States" or the Country you reside in and press the "Enter" key.
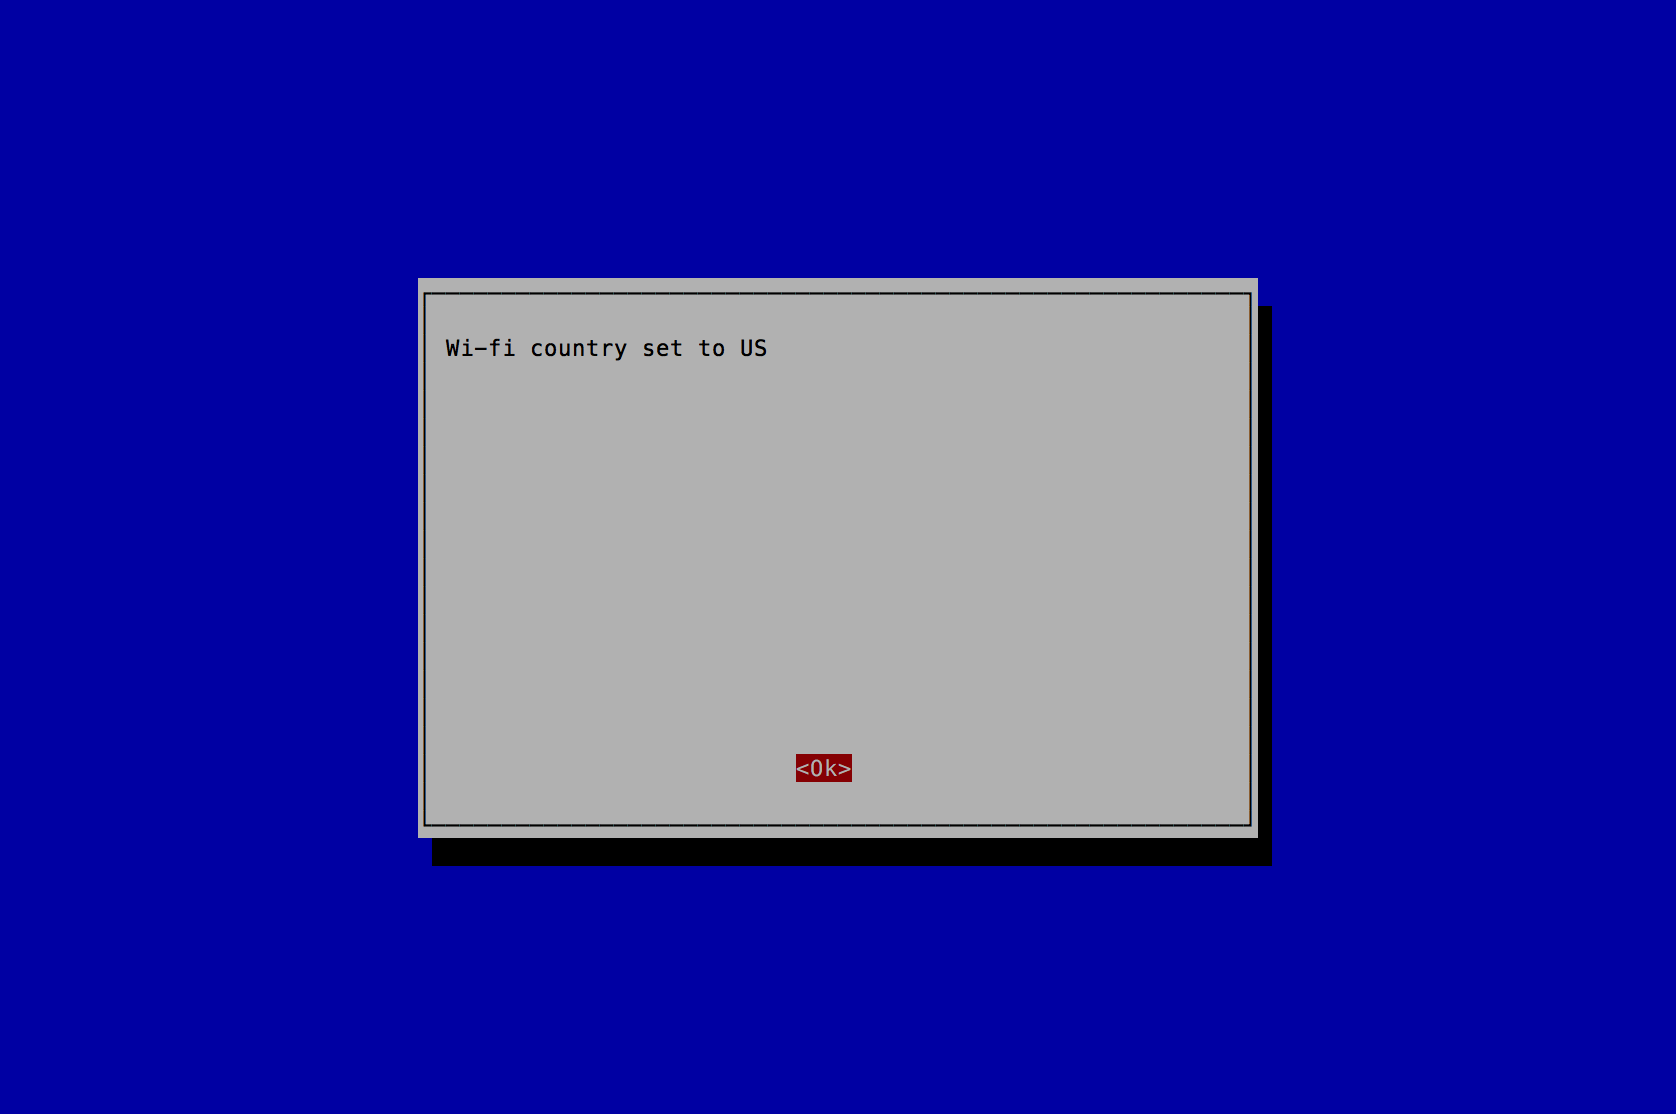
- A new prompt stating "Wi-fi country set to US" will appear, press the "Enter" key to continue.
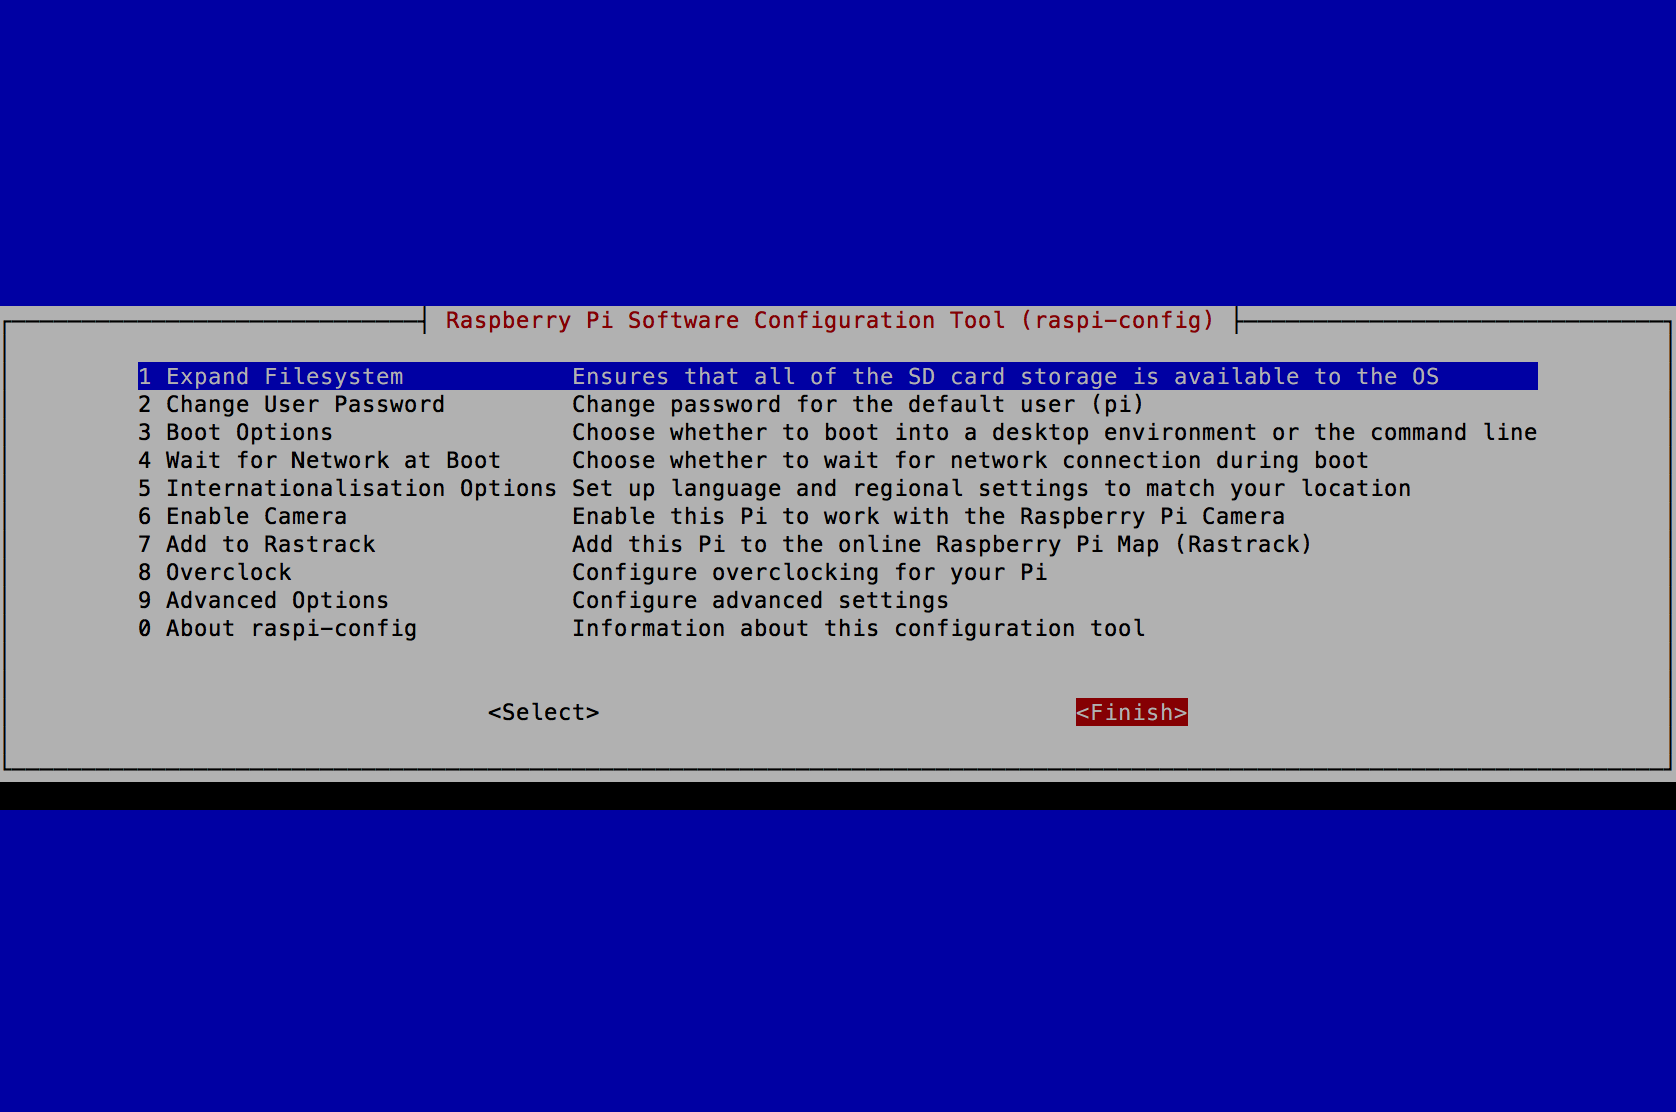
- Press the "Tab" key 2 times to select "<Finish>" and press the "Enter" key.
- A new prompt stating "Would you like to reboot now?" will appear, press the "Enter" key to continue.
- After reboot, on login prompt, login.
- Configure Networking
- sudo vi /etc/network/interfaces
- sudo service networking restart
- Update OS and Raspberry Pi Note: These commands will run for a long time.
- sudo apt-get update -y
- sudo apt-get upgrade -y
- sudo apt-get dist-upgrade -y
- sudo apt-get install rpi-update
- sudo rpi-update
- sudo reboot
- After reboot, on login prompt, login.
- Run the goSecure Server Install Script
- cd ~
- wget https://iadgov.github.io/goSecure/files/install_scripts/gosecure_server_install_pi.py Note: replace the 2 arguments in the command below with your values. (i.e. sudo python gosecure_server_install_pi.py client1@ix.mil "mysupersecretpsk")
- sudo python gosecure_server_install_pi.py <client_id (i.e. client1@ix.mil)> <client_psk (i.e. "atleast16characterswithinquotes")>
- Clean up
- sudo rm /home/pi/gosecure_server_install_pi.py
- Unplug the HDMI cable and SSH into the goSecure Server
- sudo reboot
- SSH into the goSecure Server
- sudo systemctl disable ssh
- sudo init 0

# interfaces(5) file used by ifup(8) and ifdown(8)

# Please note that this file is written to be used with dhcpcd
# For static IP, consult /etc/dhcpcd.conf and 'man dhcpcd.conf'

# Include files from /etc/network/interfaces.d:
source-directory /etc/network/interfaces.d

auto lo
iface lo inet loopback

auto eth0
allow-hotplug eth0
iface eth0 inet dhcp

auto eth1
allow-hotplug eth1
iface eth1 inet static
address 192.168.166.1
netmask 255.255.255.0

allow-hotplug wlan0
iface wlan0 inet manual
    wpa-conf /etc/wpa_supplicant/wpa_supplicant.conf
Wait 30 seconds for eth0 to obtain an IP Address.
Note: you now have the option to SSH into the goSecure client through eth1 (the USB to Ethernet adapter). Copying and pasting the commands and configuration files is recommended. Be sure to change variables where specified.
Step 2: Build Client Side
Select a client side deployment option:
- Prerequisites
- Hardware
- Raspberry Pi 3 Model B or Raspberry Pi 2 Model B (and a USB Wifi adapter like the Edimax EW-7811Un)
- 2GB (minimum size) SD Card
- Ensure nothing is plugged into the ethernet port.
- Software
- Raspbian Jessie Lite Image: https://downloads.raspberrypi.org/raspbian_lite_latest
- Install OS
- Install Raspbian Jessie Lite onto a SD Card using the instructions under the "WRITING AN IMAGE TO THE SD CARD" section from here.
- Turn on the Raspberry Pi with the SD Card installed.
- Login with the default credentials (username: "pi" and password: "raspberry").
- Configure OS
- sudo raspi-config
- Select "2 Change User Password" and press the "Enter" key.
- Press the "Enter" key when you receive a message stating "You will now be asked to enter a password for the pi user"
- A new command line prompt stating "Enter new UNIX password:" will appear on the bottom of the screen, type in your new password and press the "Enter" key.
- A new command line prompt stating "Retype new UNIX password:" will appear on the bottom of the screen, type in your new password again and press the "Enter" key.
- A new prompt stating "Password changed successfully" will appear, press the "Enter" key to continue.


- Select "5 Internationalisation Options" and press the "Enter" key.
- Select "I2 Change Timezone" and press the "Enter" key.
- Select "America" or the Country you reside in and press the "Enter" key.
- Select "New_York" or the location you reside in and press the "Enter" key.
- Select "5 Internationalisation Options" and press the "Enter" key.
- Select "I3 Change Keyboard Layout" and press the "Enter" key.
- Select "Generic 105-key (Intl) PC" and press the "Enter" key.
- Select "Other" and press the "Enter" key.
- Select "English (US)" and press the "Enter" key.
- Select "English (US)" and press the "Enter" key.
- Select "Right Alt (AltGr)" and press the "Enter" key.
- Select "No compose key" and press the "Enter" key.
- Select "5 Internationalisation Options" and press the "Enter" key.
- Select "I4 Change Wi-fi Country" and press the "Enter" key.
- Select "US United States" or the Country you reside in and press the "Enter" key.
- A new prompt stating "Wi-fi country set to US" will appear, press the "Enter" key to continue.
- Press the "Tab" key 2 times to select "<Finish>" and press the "Enter" key.
- A new prompt stating "Would you like to reboot now?" will appear, press the "Enter" key to continue.
- After reboot, on login prompt, login.
- Configure Networking
- sudo vi /etc/network/interfaces
- sudo vi /etc/wpa_supplicant/wpa_supplicant.conf
- sudo service networking restart
- sudo ifdown wlan0 && sudo ifup wlan0
- Update OS and Raspberry Pi Note: These commands will run for a long time.
- sudo apt-get update -y
- sudo apt-get upgrade -y
- sudo apt-get dist-upgrade -y
- sudo apt-get install rpi-update
- sudo rpi-update
- sudo reboot
- After reboot, on login prompt, login.
- Run the goSecure Client Install Script
- cd ~
- wget https://iadgov.github.io/goSecure/files/install_scripts/gosecure_client_install.py
- sudo python gosecure_client_install.py
- Clean up
- sudo rm /home/pi/gosecure_client_install.py
- sudo rm -rf /usr/share/doc/* /opt/vc/src/hello_pi/
- sudo find /usr/share/locale/* -maxdepth 0 -type d |grep -v en |xargs sudo rm -rf
- sudo find /usr/share/man/* -maxdepth 0 -type d |grep -Pv 'man\d' |xargs sudo rm -rf
- sudo find / -type f -name "*-old" |xargs sudo rm -rf
- sudo rm -rf /var/backups/* /var/lib/apt/lists/* ~/.bash_history
- sudo find /var/log/ -type f |xargs sudo rm -rf
- sudo cp /dev/null /etc/resolv.conf
- Unplug the HDMI cable and SSH into the goSecure Client
- sudo reboot
- SSH into the goSecure Client
- sudo systemctl disable ssh
- sudo init 0


# interfaces(5) file used by ifup(8) and ifdown(8)

# Please note that this file is written to be used with dhcpcd
# For static IP, consult /etc/dhcpcd.conf and 'man dhcpcd.conf'

# Include files from /etc/network/interfaces.d:
source-directory /etc/network/interfaces.d

auto lo
iface lo inet loopback

auto eth0
allow-hotplug eth0
iface eth0 inet static
address 192.168.50.1
netmask 255.255.255.0

auto wlan0
allow-hotplug wlan0
iface wlan0 inet manual
    wpa-conf /etc/wpa_supplicant/wpa_supplicant.conf
Note: replace the <YOUR_WIFI_SSID> with your WIFI SSID and <YOUR_WIFI_PASSWORD> with your WIFI Password.
country=US
ctrl_interface=DIR=/var/run/wpa_supplicant GROUP=netdev
update_config=1
network={
    ssid="<YOUR_WIFI_SSID>"
    psk="<YOUR_WIFI_PASSWORD>"
}
Wait 30 seconds for the Wifi to obtain an IP Address.
Note: you now have the option to SSH into the goSecure client through eth0 or wlan0 if your computer is on the same Wifi network. Copying and pasting the commands and configuration files is recommended. Be sure to change variables where specified.
Step 3: Client Setup
-
Setup:
- Plug in the Ethernet cable from the goSecure Client to the device (i.e. your laptop).
- Plug in the USB cable to the goSecure Client to the device (i.e. your laptop).
- Wait 60 seconds.
- Open a web browser and navigate to "https://setup.gosecure"
- Follow the instructions on the web page that appears. The default login username is "admin" and the password is "gosecure". You will be prompted to change them once you login.
- You can access your enterprise resources now.
- Plug in the Ethernet cable from the goSecure Client to the device (i.e. your laptop).
- Plug in the USB cable to the goSecure Client to the device (i.e. your laptop).
- Wait 60 seconds.
- You can access your enterprise resources now.
Normal use:
Documentation
Network:
Network flow diagram:

Client - User Instructions:
-
Initial Setup:
- Plug in the Ethernet cable from the goSecure Client to the device (i.e. your laptop).
- Plug in the USB cable to the goSecure Client to the device (i.e. your laptop).
- Wait 60 seconds.
- Open a web browser and navigate to "https://setup.gosecure"
- Follow the instructions on the web page that appears. The default login username is "admin" and the password is "gosecure". You will be prompted to change them once you login.
- You can access your enterprise resources now.
- Plug in the Ethernet cable from the goSecure Client to the device (i.e. your laptop).
- Plug in the USB cable to the goSecure Client to the device (i.e. your laptop).
- Wait 60 seconds.
- You can access your enterprise resources now.
Normal use:
API
goSecure Client REST API examples using curl
Note: Add "--insecure" to the end of the curl command if your computer does not trust the goSecure client's self signed certificate.
| # | Action | curl command |
|---|---|---|
| 1 | Set VPN credentials | curl --user admin:gosecure -H "Content-Type: application/json" -X POST https://192.168.50.1/v1.0/vpn/credentials -d '{"vpn_server":"server1@ix.mil", "user_id":"client1@ix.mil","user_psk":"mysecretpsk"}' |
| 2 | Reset (clear) VPN credentials | curl --user admin:gosecure -H "Content-Type: application/json" -X DELETE https://192.168.50.1/v1.0/vpn/credentials |
| 3 | Start VPN service and establish connection | curl --user admin:gosecure -H "Content-Type: application/json" -X POST https://192.168.50.1/v1.0/vpn/actions -d '{"action":"start_vpn"}' |
| 4 | Stop VPN service and close connection | curl --user admin:gosecure -H "Content-Type: application/json" -X POST https://192.168.50.1/v1.0/vpn/actions -d '{"action":"stop_vpn"}' |
| 5 | Restart VPN service and establish connection | curl --user admin:gosecure -H "Content-Type: application/json" -X POST https://192.168.50.1/v1.0/vpn/actions -d '{"action":"restart_vpn"}' |
FAQ
How do I add more clients to the system?
Refer to the comments in the "/etc/ipsec.conf" configuration file on the goSecure server. Also add a new line to the "/etc/ipsec.secrets" configuration file on the goSecure server that contains the new <unique_id_of_client> and a new unique password.
License
This work was prepared by an U.S. Government employee and, therefore, is excluded from copyright by Section 105 of the Copyright Act of 1976. Copyright and Related Rights in the Work worldwide are waived through the CC0 1.0 Universal license.
Disclaimer
Disclaimer of Warranty
This Work is provided "as is." Any express or implied warranties, including but not limited to, the implied warranties of merchantability and fitness for a particular purpose are disclaimed. In no event shall the United States Government be liable for any direct, indirect, incidental, special, exemplary or consequential damages (including, but not limited to, procurement of substitute goods or services, loss of use, data or profits, or business interruption) however caused and on any theory of liability, whether in contract, strict liability, or tort (including negligence or otherwise) arising in any way out of the use of this Guidance, even if advised of the possibility of such damage.
The User of this Work agrees to hold harmless and indemnify the United States Government, its agents and employees from every claim or liability (whether in tort or in contract), including attorneys' fees, court costs, and expenses, arising in direct consequence of Recipient's use of the item, including, but not limited to, claims or liabilities made for injury to or death of personnel of User or third parties, damage to or destruction of property of User or third parties, and infringement or other violations of intellectual property or technical data rights.
Nothing in this Work is intended to constitute an endorsement, explicit or implied, by the U.S. Government of any particular manufacturer's product or service.
Disclaimer of Endorsement
Reference herein to any specific commercial product, process, or service by trade name, trademark, manufacturer, or otherwise, in this Work does not constitute an endorsement, recommendation, or favoring by the United States Government and shall not be used for advertising or product endorsement purposes.